Announcement

Collapse
No announcement yet.

2002 Tige 21i Type R 5.7 SKI carb engine knocking sound.

Collapse
X
 
  • Filter
  • Time
  • Show
Clear All
new posts

    2002 Tige 21i Type R 5.7 SKI carb engine knocking sound.

    Hi Tigeowners.

    I hope I can get some advice on some issues with my 2002 Tige. Here's my story

    The other day my boat started running a bit rough. Both in idle and a few times when pulling wakeboard it would not take the gas right away. It felt like it was coughing a few times before if would accelerate.
    The next day I started her up again and then I could hear like a ticking sound from the engines right side. I shut her down and cleaned the distributer cap and added fuel + additive. After that the idle was good and the ticking sound was gone. I haven't been pulling wakeboard yet so I don't know if the under load coughing part is fixed.

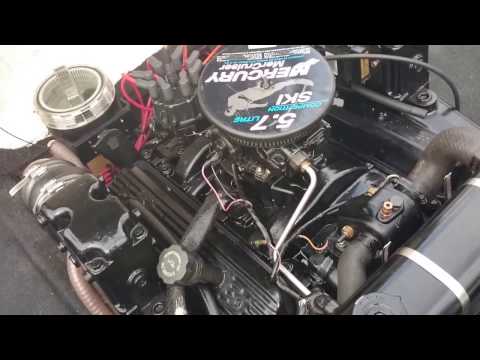
    Here's a clip of the ticking
    https://www.youtube.com/watch?v=f-Cp...ature=youtu.be


    Should i be worried about the ticking sound even though it disappeared again?

    #2
    Yes. Do a compression test on that side of the motor. You may have an exhaust valve hanging up and not making power. What oil are you using?
    Fixing everyone elses boat just so I can use mine...

    Comment


      #3
      Thank you for your reply. I use 15W-40 marine oil With these nummers on. ACEA E3/E5/E7, API CI-4/SL, MB 228.3, VOLVO VDS-3, MAN M3275, CUMMINS 20076/20077, MACK EO-M+, CAT ECF-1-A.
      Last edited by Ulrik; 09-01-2014, 05:22 PM.

      Comment


        #4
        I will try the compression test. What values should I get for compression ?
        Last edited by Ulrik; 09-01-2014, 05:22 PM.

        Comment


          #5
          Since you mess with distributor cap and it quit, one other thing you can easily do is check the spark plug wires, sometimes but not always if you get one with a bad spot and it starts arcing to the block it can have a knocking sound, and obviously kills your power to that cylinder. If that isnt it BoatWakes is correct start with a compression test.

          Comment


            #6
            I think you should look for consistency with each cylinder rather than a specific #. Just keep track of each one, write them down and post up your findings.
            Mike Allen, Tigé owner since 1997

            Comment


              #7
              100 psi minimum with the group being no more than 10% from any other.
              Fixing everyone elses boat just so I can use mine...

              Comment


                #8
                I finally got the compression test Done. I'm not sure if I did it right anyway this is how I did.
                • Started the motor up and had it running until it was at operation temperature.
                • Unplugged the main wire to the distributor.
                • Pulled 1 plug at a time and attached the compression tester.
                • Turned the key until the compression tester did not move anymore (like 5 sec)
                • Mounted the plug again and on to the next.


                After the the test was done I did a retest on number 3 and got it up to 115 psi
                8 = 160 7 = 140
                6 = 160 5 = 175
                4 = 165 3 = 105/115
                2 = 175 1 = 170

                Comment


                  #9
                  It looks like the problem is number 3. What can I do to fix this?

                  Comment


                    #10
                    Does the plug on #3 show any signs of rust? The most common problem we encounter with low compression comes from leaking exhaust riser gaskets and it ALWAYS affects the center cylinders first. Water will trickle down between the riser and manifold inside the exhaust chamber and cause the exhaust valve to corrode on the stem and/or corrode the exhaust valve seat at the same time. The corroded stem could hang up in the guide and cause physical contact between the valve face and piston (new motor) but usually the seat begins to corrode and lose good surface contact with the valve face and cause the lower compression. My recommendation is to do a valve job on the odd bank and replace all exhaust manifolds and risers. It's extremely important to have the correct guides and valves installed. If you are unable to source someone in your area, I can ship you everything you need and walk you through how to do it, all you need is a good torque wrench.
                    Fixing everyone elses boat just so I can use mine...

                    Comment


                      #11
                      This is from the bad side but which number I don't remember.
                      tændrørfarve.jpg
                      Well i guess its time to pull the engine and get started. Some help and guiding would be much appreciated I live in Denmark so I don't know if the shipping offer still stands.
                      Last edited by Ulrik; 09-23-2014, 08:37 AM.

                      Comment


                        #12
                        You might just need to remove the head and not the entire motor.
                        Mike Allen, Tigé owner since 1997

                        Comment


                          #13
                          You don't need to pull the motor!!!
                          Get a plastic organizer box to store and label all the bolts, washers and nuts removed during this process. YOU MUST BE ORGANIZED when you do this or you'll pull out your hair trying to figure out where stuff goes. Take pictures, pictures and more pictures too!!!
                          1) Drain the block of coolant. There is a 9/16" head block plug located just above the oil pan on each side of the motor in the center, some of these plugs have been converted to the blue t-handle drain style, either way, pull the plug and drain out the coolant.
                          2) Pull the lower hose on the exhaust manifold and drain the manifold.
                          3) Remove all the spark plugs and turn the motor over using the bolt on the front of the crankshaft balancer until the timing mark on the balancer is inline with timing mark on the timing chain cover. The mark on the timing chain cover is about 1:30-2:00.
                          4) Remove the exhaust manifolds and risers as a set then disassemble the risers from the manifolds and save the block off plate between the two if it has one. Notice the water trail inside the manifold and how bad the exhaust port will look on number 3.
                          5) Remove the heat exchanger and flush it out on both coolant and raw water sides until it's clean. If you run the boat in salt water I'll have you open the end caps rod them out carefully with a 3/16 welding rod.
                          6) Remove the valve cover. (I would do a valve job on both heads but it's up to you)
                          7) Remove the rocker arm nuts and keep the assemblies together in a labeled ziploc bag. Label them #1I, #1E and #2I, #2E etc…
                          8) Remove the pushrods and roll them individually on a known flat surface to check for bent ones. I would also advise replacing them at this time too, $20 more.
                          9) Remove the distributor cap and note the location of the rotor, it will be at either #6 or #1 on the cap after you correctly followed the timing mark instructions.
                          10) Remove the fuel line going into the carb, you'll need a big crescent wrench and a 5/8" open end. Use a paper towel to absorb the fuel that will come out, not much but it's there.
                          11) Remove the 8 bolts that hold the intake manifold to the cylinder heads. At this time also locate, label and remove any wires, brackets or hoses that will be in the way for the head removal.
                          12) Use a large flat blade screwdriver and vein prying on the intake manifold to cylinder head connection points near the bolt holes. This may take some gumption and it will begin to make some neat noises when it starts to separate. It will take some time to break the seal so be patient. Once it's off, set it off to the side and leave the carb on unless you want to rebuild it.
                          13) Use paper towels to line the inside of the lifter valley and keep it dirt free. Then lay a piece of plastic like a kitchen trash bag over the paper towels and put another layer of paper towels on top. DO NOT USE SHOP RAGS OR LINENS!!!!! Paper towels are oil soluble and don't leave lint.
                          14) Loosen the head bolts one at a time starting at the outside of the bolt pattern and work your way in using a circular pattern. There are 17 bolts and some are located by the spark plugs so don't forget those before you try to lift off the head! Leave the center bolt in and loose until you're ready for removal.
                          15) There are two locating dowel pins in the block to head mating surface so the head won't slide off but at this point it's ready for removal. Lift with one hand in an outside exhaust port and the other in the opposite end intake port, until you feel the head come free. Then set it back down on the block and remove the last head bolt and then pull off the head. It weighs about 45lbs or 20kg so be ready.
                          16) Use ATF and wipe down the exposed cylinders after initial inspection then cover the block deck with paper towels soaked in aft to prevent rust.

                          When you're ready for reassembly you'll need permatex bolt thread sealant, new marine head gaskets, engine assembly lube, vortec marine intake gaskets, black rtv silicone sealant and a good torque wrench, hopefully one that can do angles too. No biggie if it can't though.
                          Last edited by boatwakes; 09-23-2014, 04:18 PM.
                          Fixing everyone elses boat just so I can use mine...

                          Comment


                            #14
                            boatwakes, I gotta say the info you share here is beyond impressive. Something tells me you typed all of that from memory. Thanks for all the help you cheerfully give to the rest of us here!

                            Comment


                              #15
                              Yes thank you very much for all this information. I'm sure I will get through this with this kind of help
                              Anything special I should look for when I order the riser and exhaust manifolds it looks likes there's many different models? Does it need to be original or are the copy ones just as good? My engine serial number is l679619
                              Again thank you.

                              Comment

                              Working...
                              X