Announcement

Collapse
No announcement yet.

FAE install with trim tab mounts

Collapse
X
 
  • Filter
  • Time
  • Show
Clear All
new posts

    FAE install with trim tab mounts

    Hi,

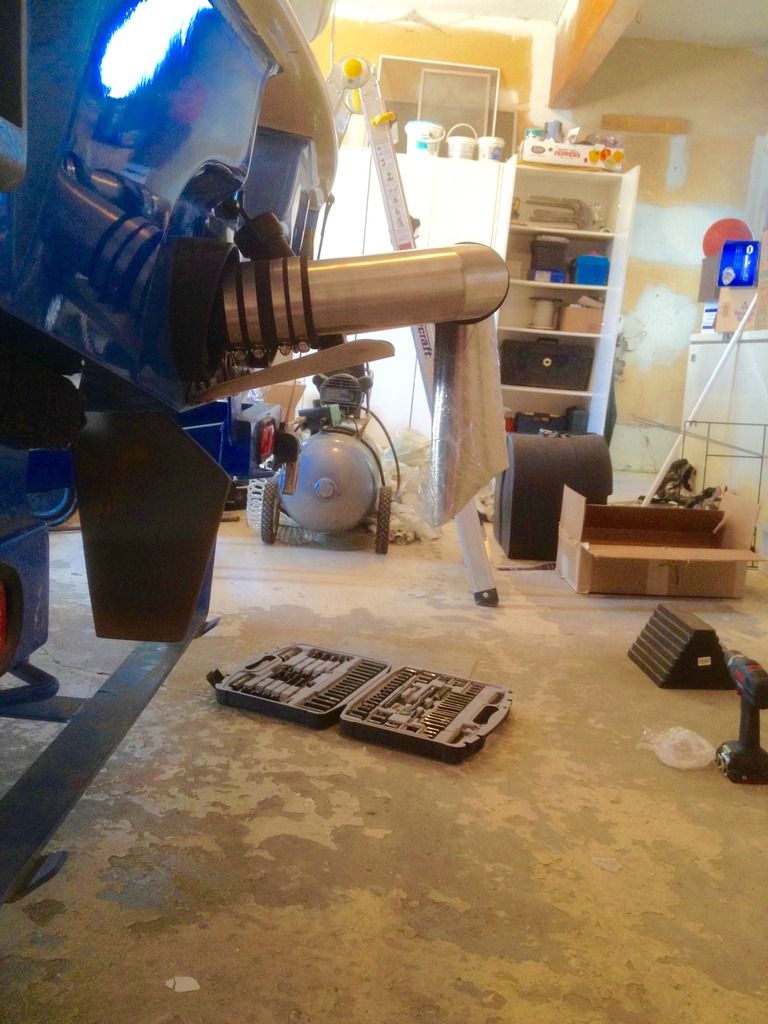
    I just finished installing a Fresh Air Exhaust on my 2014 R20, which has dual exhaust, using the new trim tab mounting brackets. I took a few photos along the way so I'm posting some of them to help anyone else in a similar situation.

    First, the before photo: IMG_20160212_080109834.jpg

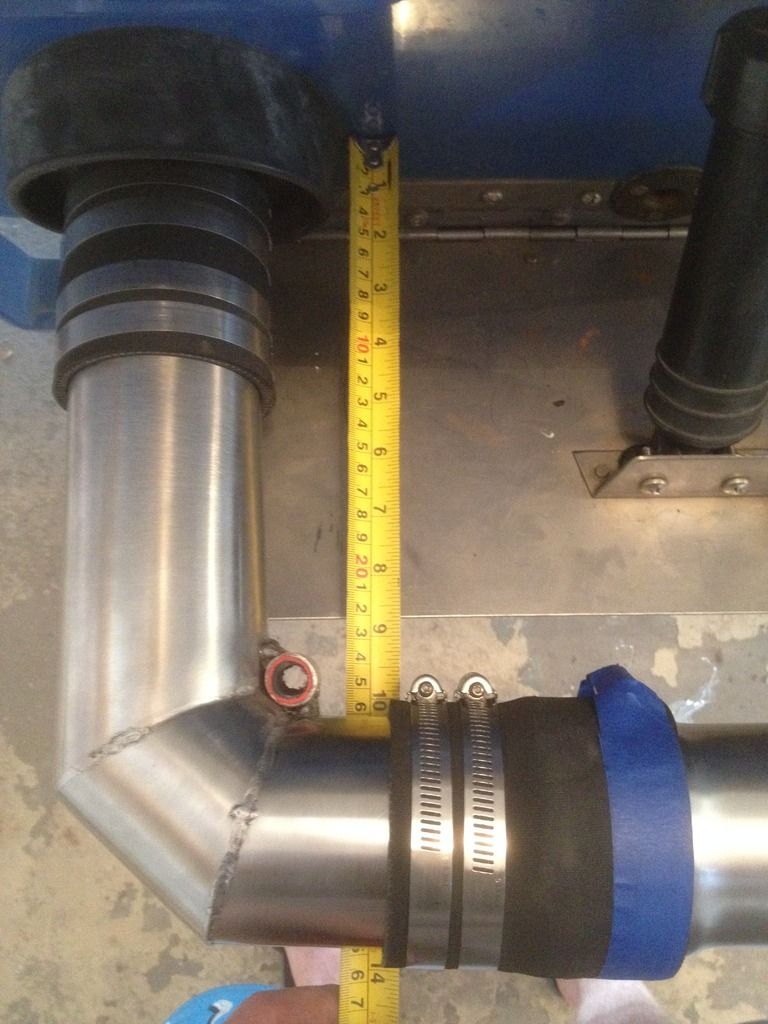
    Here are my measurements for the screw spacing on the trim tab hinge. (The other side is symmetrically the same.)
    IMG_20160217_080220516.jpg

    I marked the middle of each exhaust and then measured the centre-to-centre distance for Larry at BoatPipes.com:
    IMG_20160430_134838288.jpgIMG_20160430_134912991.jpg

    Removing the flappers and installing the adapters was pretty easy:
    IMG_20160430_135520002.jpg

    Both adapters are installed (for now, without silicone, but if I were doing it again, I would just do it once and pointed up, as designed:
    IMG_20160430_140246867.jpg

    Each hose was about 3.5 inches long, and Larry said it's OK for the pipes to butt against other, so I marked off 1.75 inches with a piece of tape, slid the hose onto the pipe, and installed a clamp temporarily:
    IMG_20160430_143623638_HDR.jpg

    It turns out that one of the uppers screws on each side of the trim tab hinge is actually a bolt with a lock nut, so I used the lower screws instead. The outer lower screw spacing is 2 inches... the bracket came pre-drilled. Here's what they look like at this point.
    IMG_20160430_150008575_HDR.jpg

    The brackets that came with my order were straight (90 degrees), so I needed to bend them about 8 degrees port and starboard so they lined up with the bolt in the FAE elbows. Larry said to stick them in a vice and get a long pipe for leverage. I took a guide bar off my trailer to use as the long pipe -- worked great!
    IMG_20160430_161001316.jpg

    I shortened the threaded rod to make it easier to work with, but still an inch or 2 too long.
    IMG_20160430_163820436.jpg

    (More in next post.)
    Last edited by PaceWithGrace; 05-02-2016, 01:45 AM. Reason: fix typo

    #2
    After lots of little bends, the threaded rod lined up nicely with the trim tab bracket. The second photo shows where I marked for drilling.
    IMG_20160501_115103110_HDR.jpgIMG_20160501_115314987_HDR.jpg

    I used several drill bits of increasing size to make the bolt holes.
    IMG_20160501_121346428.jpg

    Here are the starboard and port brackets after bending. The angles are about 7 and 9 degrees. Later, I cut them a little shorter, too.
    IMG_20160501_130745833.jpg

    Here's how the upright mounts to the FAE elbows. The threaded rod goes through a piece of straight pipe to provide the required spacing, and because it looks better.
    IMG_20160501_140006204_HDR.jpg

    The clamps come apart so you can put them on even with other things in the way.
    IMG_20160501_140324823_HDR.jpg

    All assembled and ready to install. Note that I eventually flipped the rear clamps so I could tighten them from the top (since I left my TAPS plate attached).IMG_20160501_140758995.jpg

    Test fit with all bolts and clamps still loose. You can see I'm still using the original Philips head screws for the trim tab mount. Later I use the longer hex bolts supplied in the kit.IMG_20160501_141732970_HDR.jpg

    Inside view of clamps and mount. Note I flipped the rod upside down (and shortened it) so the lock nut is hidden.
    IMG_20160501_165137050.jpg

    (More in next post.)
    Last edited by PaceWithGrace; 05-02-2016, 02:10 AM.

    Comment


      #3
      It's finished!
      IMG_20160501_165206447.jpgIMG_20160501_165217460.jpg

      I didn't take photos but I did:
      - apply silicone to mount bolts when installing them
      - tighten the clamps with a socket and wrench
      - measured the FAE-to-ground and prop-to-ground distance for feedback to FAE and to enable the warranty.

      I have to admit that I was a bit skeptical about the strength of this mount, but it's actually very strong. The FAE would probably stay in place with just the exhaust clamps, but the trim tab hinge mount is very solid and doesn't move at all left-right or up-down. You can see in some photos that the bracket has an extra angle welded to it, and I have gained respect for the strength of the bracket and the welds after needing a 4-foot lever to bend it in a vice.

      This took me about 6-7 hours but I wasn't rushing, I took photos, and I went the extra mile to get everything square and even. Despite needing to adjust the brackets by bending them, I think I could do it again in half that time.

      Cheers,
      Severin B.

      Comment


        #4
        Can someone please explain to me how this product got shipped out with those welds on it? And why you need to make brackets to fit? Is this a cheaper option or did you still pay full price? Just terrible.

        The best part about this is the write up.

        Comment


          #5
          Sweet! Looks great. That looks like a much easier way of installing, especially when removing the platform often.

          You will have to come up north a bit and compare how much quieter it really is.

          Comment


            #6
            Originally posted by UNSTUCK View Post
            Can someone please explain to me how this product got shipped out with those welds on it? And why you need to make brackets to fit? Is this a cheaper option or did you still pay full price? Just terrible.

            The best part about this is the write up.
            Not just me that noticed the poor weld then!

            Sent from my HTC One_M8 using Tapatalk

            Comment


              #7
              Originally posted by chrissnow View Post
              Not just me that noticed the poor weld then!

              Sent from my HTC One_M8 using Tapatalk
              Well, I'm a welder. Most of us take great pride in our work. It's obvious this guys doesn't. While it is true that, "an ugly weld can live for ever and a pretty weld can fail today", in the aftermarket parts world, welds need to do both.

              Comment


                #8
                My kit came with the normal mounting parts but I agreed to try out these new trim tab hinge brackets. Larry intended for the brackets to come straight out (90 degrees) and use a crossbar between them to attach the threaded rods. I thought the above looked much cleaner, but it required custom bending. I don't know if angled brackets will be an option in the future. No, i did not choose a cheaper option.

                SB

                Comment


                  #9
                  The poor weld is mainly caused by poor design. it's just not really possible to get a good weld into that joint due to the angles involved, a simple flat triangle welded in the corner with a drilled hole would be much neater.

                  that said... to not even clean the weld up and sell it in that condition is pretty shocking!!, 30 second with a grinder would have made that so much better. all the other joints are fairly tidy.

                  Comment


                    #10
                    thanks for posting about the install. I have the same kit and was going to install it this month. I'll also post pictures when I put it all together.

                    Comment


                      #11
                      PaceWithGrace, does your trim plate hit that hinge mount in its full up position? I am just at that point of the install and its looking like I'm going to have to bend the mounts up, as well as out. Just wondering if you had that problem.

                      Comment


                        #12
                        Here is a pic of the FAE with the trim plate in its full up position. You can see how much I would have to bend the mount up for this to work.

                        Comment


                          #13
                          Originally posted by killerbren View Post
                          PaceWithGrace, does your trim plate hit that hinge mount in its full up position? I am just at that point of the install and its looking like I'm going to have to bend the mounts up, as well as out. Just wondering if you had that problem.
                          Yes, it *just* touches at full up TAPS. I mentioned it to the company but they didn't reply. I never use full TAPS so I haven't done anything about it yet.

                          Comment


                            #14
                            Killerbren, that's a good side shot of your set up. I'm courious about how far back the exhaust goes. I would think one would want it to be as short as possible so it has less leverage against it. Your looks like it could be shortened 2-3 inches and still clear you taps plate.

                            Does anyone know of a reason to have it stick out as far as this one does?

                            Comment


                              #15
                              Originally posted by UNSTUCK View Post
                              Killerbren, that's a good side shot of your set up. I'm courious about how far back the exhaust goes. I would think one would want it to be as short as possible so it has less leverage against it. Your looks like it could be shortened 2-3 inches and still clear you taps plate.

                              Does anyone know of a reason to have it stick out as far as this one does?
                              There is a little bit of photo trickery going on in that picture, and the FAE looks like it sticks out further than it actually does. In reality, it is only sticking out about 1.5" past the edge of the trim plate (with trim plate in full up position). If taps was set in the middle im sure that would change to about 1" past.

                              Comment

                              Working...
                              X